Zendesk integration
Authentication
Supported authentication methods
Zendesk removed email and password authentication on 12 January 2026, and new Bugsee integrations are connected with OAuth. An existing integration that authenticates with an API token keeps working; one that still uses a password must be reconnected.
OAuth
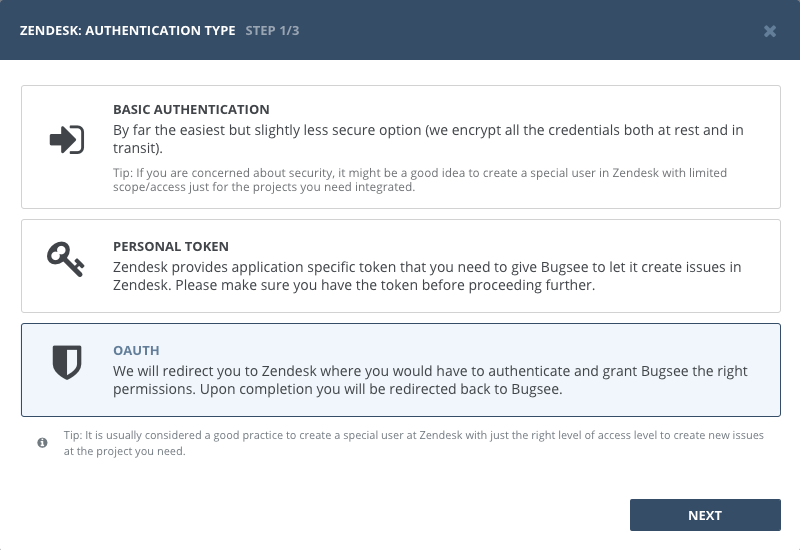
Select "OAuth" in the first step of integration wizard. Click Next.
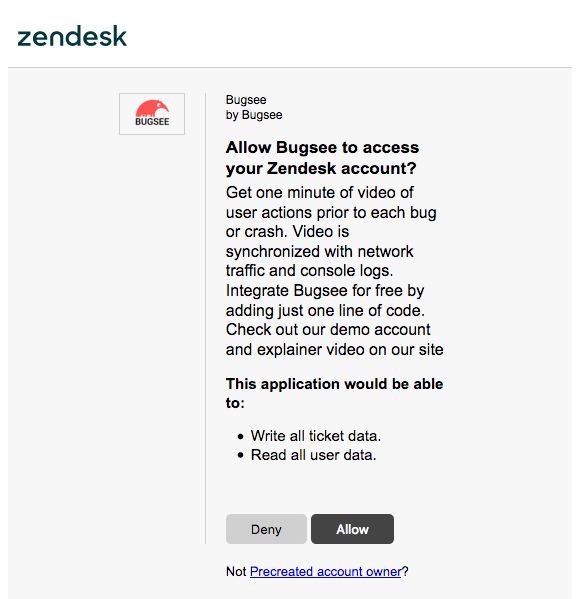
You will be presented with dialog asking you to authorize Bugsee. Click "Allow" to allow Bugsee access your Zendesk.
Configuration
There are no specific configuration steps for Zendesk. Refer to configuration section for description about generic steps.
Custom recipes
Bugsee can accommodate all the customizations required for your Zendesk with the help of custom recipes. This section provides a few examples of using custom recipes specifically with Zendesk. For basic introduction, refer to custom recipe documentation.
Setting tags field
By default Bugsee creates and updates Zendesk tickets with Bugsee issue labels as Zendesk tags. But labels list can be overridden inside your custom recipe. For example you can add some new label (Zendesk tag) to existing ones:
function create(context) {
	// ....

    return {
    	// ...
    	labels: [...issue.labels, "My awesome tag"]
    };
}

function update(context, changes) {
	const result = {};
	// ...

    if (changes.labels) {
        result.labels = [...changes.labels.to, "My awesome tag"];
    }

	return {
        issue: {
            custom: {}
        },
        changes: result
    };
}
Setting resource type
Bugsee creates Zendesk tickets by default. But also allows to create entities with different resource type, for example requests. You just need to tweak custom field inside your custom recipe:
function create(context) {
	// ....

    return {
    	// ...
    	custom: {
          as: "request"
      }
    };
}